
8m x 4m Canopy Garden Room in Ripon, North Yorkshire
Ripon, North Yorkshire
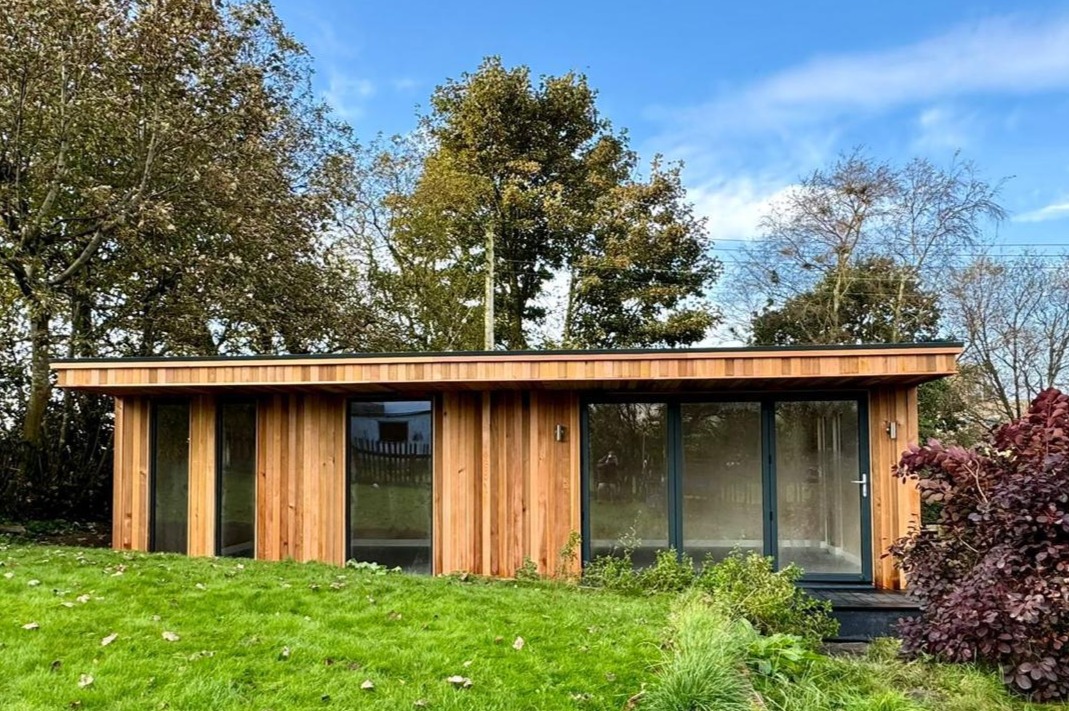
An eight-metre frontage gives this 8m x 4m canopy garden room in Ripon, North Yorkshire, a substantial presence within its established garden. Warm vertical timber cladding runs across the exterior, interrupted by tall glazed sections and a broad entrance on the right. Above, a projecting canopy extends across the building, drawing a continuous line beneath the surrounding trees.
The setting contributes as much to the appearance as the building itself. Lawn fills the foreground, mature trees rise behind the roof and a deep red shrub frames the right-hand side. Planting softens the base of the frontage, allowing the room to feel closely connected with the garden around it.
The photograph also shows how the glazing is distributed along the wide elevation. Tall sections towards the left and centre provide different outlooks, while the right-hand entrance gives access from a dark landing area. For local inspiration, explore our Garden Rooms Ripon page to see how we approach designs for homes and gardens in the area.
A wide building with a clear horizontal shape
The 8m x 4m external dimensions give this garden room an overall footprint of 32 square metres. Its eight-metre width is the first thing you notice from the lawn. The roof projection reinforces that width, giving the front a clear horizontal edge.
The vertical cladding introduces a different rhythm beneath it. Individual boards draw the eye down towards the planting and ground level, while the glazing creates larger breaks across the elevation. The result is a frontage with enough detail to remain interesting across its full length.
A building of this size needs to be considered from a distance as well as close up. From the house, its overall proportions and position within the garden will be prominent. At the entrance, the cladding, frames and canopy underside become easier to appreciate.
Before choosing a similar footprint, mark it out on the ground and view it from several positions. Include the roof projection and approach so you can judge the complete arrangement.
A canopy extending across the full frontage
The full-width canopy is a defining feature of this installation. It projects forward from the wall and creates a shaded band above the doors and windows.
In the photograph, the canopy has a warm timber face beneath a slim dark roof edge. This gives the roofline a lighter appearance against the trees while retaining a clear outline. The projection also creates depth that becomes more noticeable towards the ends of the building.
The canopy provides some overhead shelter close to the frontage, depending on wind direction and weather conditions. It also marks the transition between the enclosed room and the garden immediately outside.
When planning your own canopy, consider its relationship with the entrance and surrounding planting. A projection can look particularly effective across a broad building, but its depth should be assessed alongside the available space and the route from the house.
Vertical timber cladding brings warmth to the garden
The vertical timber cladding gives the exterior its warm appearance. Variations between boards introduce detail across the larger solid wall sections, especially where sunlight reaches the frontage.
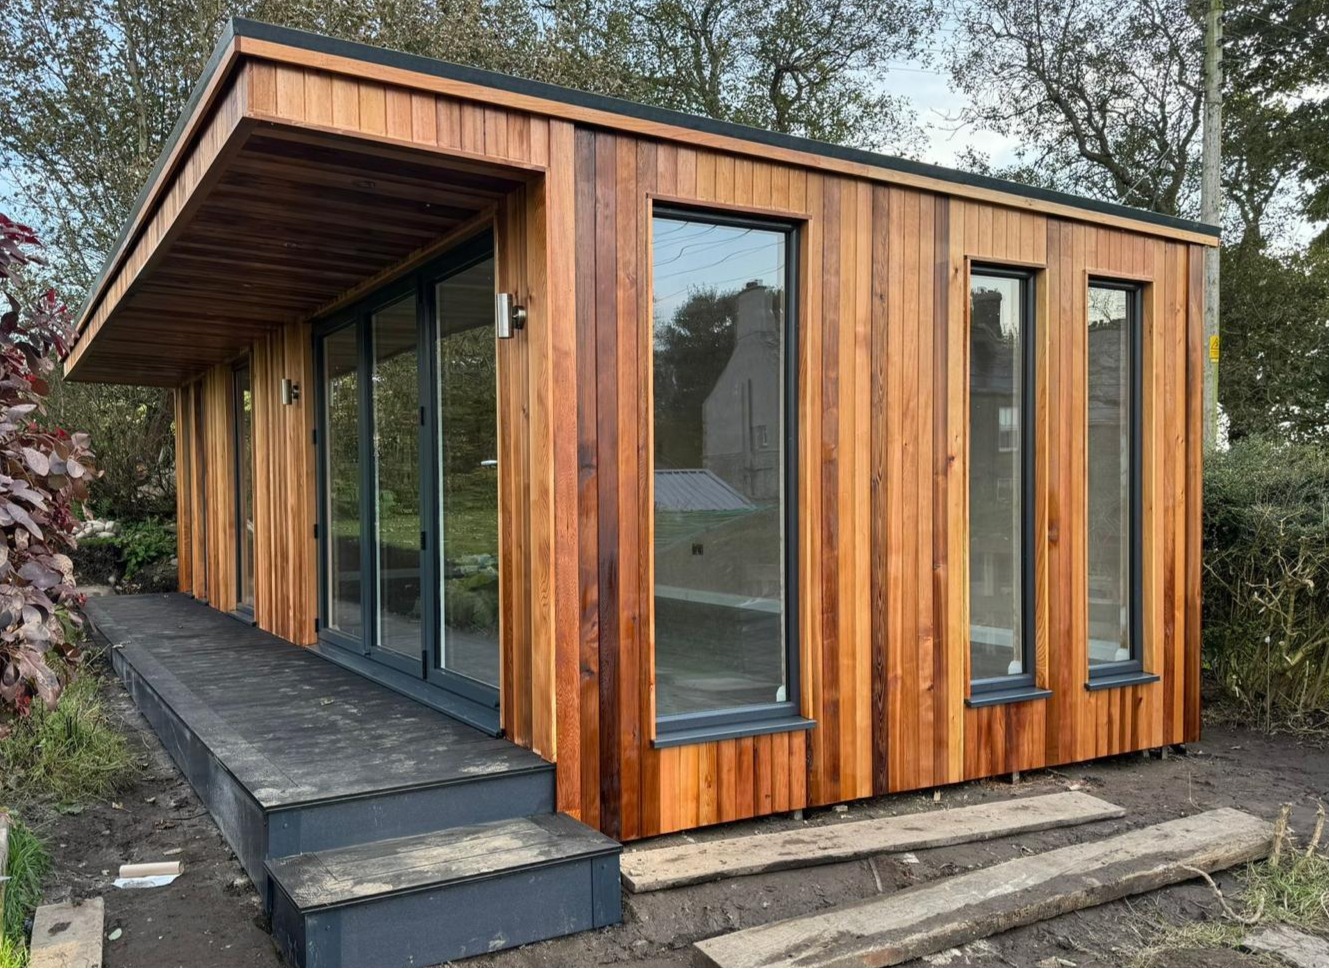
The photograph captures a range of tones, from brighter golden surfaces near the canopy edge to deeper colours beneath the projection. Those changes help reveal the building’s depth and the texture of the timber.
The cladding also works comfortably with the established garden. Green foliage and the red shrub provide contrasting colours, while the trees give the timber building a natural backdrop.
If you are comparing cladding for a similar project, look at samples beside the plants, paving and fencing you intend to retain. The surrounding colours can influence how a finish appears. We can explain the available timber options and their care requirements when developing your specification.
Explore more exterior choices in our Premium Garden Room range.
Glazing distributed across an eight-metre elevation
The front combines several tall glazed areas with substantial sections of timber between them. This gives the building different points of connection with the garden.
At the left-hand end, glazing sits close to the corner. A separate tall pane appears nearer the centre, and the broad entrance occupies the right-hand section. From inside, those positions can provide different views depending on where someone sits.
This distribution can be useful in a larger room. It allows daylight to reach different areas while retaining solid walls that may be needed for furniture, shelving or equipment.
The best glazing arrangement begins with the intended activities. A lounge may benefit from a wide view beside the main seating. A workspace might need daylight at an angle to a screen. A hobby area could require a solid wall for storage close to a well-lit work surface.
Thinking about those uses early helps the glazing contribute to the finished interior.
Tall glazing towards the left-hand corner
The tall glazed sections at the left create a more open appearance at that end of the building. Their dark frames provide clear vertical lines against the timber cladding.
From the garden, this glazing gives the left end a feature of its own. It balances the larger glazed entrance on the right without requiring the whole frontage to be glass.
Inside, tall glazing can preserve an outlook from furniture positioned towards the end of a room. A chair or desk placed nearby may enjoy a different part of the garden from someone seated closer to the main entrance.
For a comparable design, check the view at seated height. A window that looks well positioned from outside can offer a different outlook once the room is furnished. That simple exercise can help establish where each glazed section will be most useful.
A broad glazed entrance on the right
The wide glazed entrance is positioned on the right-hand side. Its location gives the customer a defined way into the building, with a dark landing area visible immediately outside.
The entrance glazing also provides a substantial view of the garden. The red shrub partly frames this section from the angle shown, introducing planting close to the doorway while leaving the main glazed area visible.
On a similar project, the route to the doors should be planned alongside the internal layout. Entering near one end of a large room can work well if there is a comfortable route to the main activity areas.
Allow space immediately inside for arriving with bags, refreshments or equipment. Larger furniture should also be checked against the usable opening and the turning room available on both sides.
The door mechanism and clear opening dimensions can be confirmed as part of the specification for your own building.
Exterior lights add detail to the timber frontage
Small exterior wall lights are visible between and beside the glazed sections. Their compact fittings introduce subtle details against the timber.
Lighting becomes particularly relevant when a garden room is used during darker mornings or evenings. The fittings on the building can help define the frontage and entrance after daylight fades.
The route from the house deserves attention too. A light beside the doors serves the immediate area, while a path, bend or change in level farther away may need its own provision.
When planning lighting, explain how you expect to use the room. Someone leaving after a full working day may have different requirements from a customer visiting briefly in the afternoon. The position of controls should follow the routes used most often.
An established garden softens the building’s scale
A large garden room can become a prominent feature, and the surrounding planting helps determine how it sits within the property. Here, the mature trees rise well above the roof and give the building an established backdrop.
The lawn provides an open foreground, allowing the whole frontage to be seen. Lower planting breaks up the line at ground level, while the red shrub adds height and colour near the right-hand entrance.
These different layers make the setting feel varied. The room is seen within a garden that already has shape and character, with the canopy forming one horizontal line among the trees and foliage.
For your own project, identify which plants and views you want to retain. Show them during the design discussion so the building position, glazing and approach can be considered together.
Planning around trees and growing plants
Mature planting should be included in the site assessment from the beginning. The position of trees, the condition of the ground and the access needed for installation can all influence the proposed arrangement.
Plants near the frontage also need room to grow and be maintained. A border may look modest when the room is installed and become fuller over time.
Think about how you will reach the exterior for cleaning and care. The same applies to garden maintenance around the sides and rear. Convenient access helps the building and planting continue to work together as the setting develops.
Photographs from several directions are useful before a survey. Include the proposed footprint, nearby trees and the route materials would take through the property. These views help explain the practical circumstances alongside the appearance you want.
Making use of a substantial internal space
The 8m x 4m footprint offers scope for several furniture arrangements, although the finished internal dimensions will be smaller than the external measurements.
A similar building could accommodate a generous lounge, a dedicated workspace or a combination of activities. The width makes it possible to group furniture at opposite ends, while the four-metre depth provides more flexibility around larger pieces.
Begin with the main purpose. If the room is for relaxation, position the principal seating around the preferred garden view. For work, establish the desk, chair and equipment requirements before adding occasional furniture.
The right-hand entrance should guide the circulation plan. Keep a comfortable route from the doors to the areas used most frequently, then place cabinets and larger furniture around it.
Our garden office range provides further layout ideas if home working is a priority. Different glazing arrangements can also be explored within the wider garden room collection.
Choosing furniture around daylight and views
The varied glazing gives several potential positions for desks and seating. The most useful layout depends on where daylight falls and what the customer wants to see while using the room.
A desk may work well at an angle to the glass, allowing a view outside while the screen is adjusted to manage reflections. A reading chair could sit nearer a tall panel, with a small table beside it.
Solid wall areas are valuable for taller furniture. Keeping cabinets away from the main glazed sections can preserve more of the outlook and allow daylight to reach farther into the interior.
Measure furniture when it is in use as well as at rest. Chairs pull back, cupboard doors open and people need to pass. Including those clearances gives a more realistic plan than fitting furniture outlines into an empty rectangle.
Developing the design for your Ripon property
Start with photographs of the garden and approximate dimensions of the area available. Explain the activities you want to accommodate and which parts of this installation appeal to you.
You might prefer the full-width canopy, the warm vertical cladding or the way glazing is distributed across the frontage. Those ideas can be adapted around a different footprint and garden setting.
A site survey gives us the opportunity to assess levels, access and nearby features before the specification is agreed. The quotation can then identify the building, glazing, finishes and selected additions clearly.
For local information and further inspiration, visit our Garden Rooms Ripon page. We can discuss how a garden room could fit the space and routine at your own home.
Visit our two indoor showrooms in Ripon
Oeco is a family-run business established in 2006. Our two indoor showrooms in Ripon give you the opportunity to walk through finished buildings, compare materials and discuss different layouts with our team.
Bring photographs, measurements and details of any furniture you already want to include. Seeing buildings at full scale can help you decide how much space you need and which glazing arrangement suits your plans.
If this 8m x 4m canopy garden room in Ripon, North Yorkshire, has inspired your project, plan a visit to our showrooms or call Oeco free on 0800 170 1270 to request a fixed-price quotation or ask about a free site survey.